Batch WaterMark in Auto-Contrasting Colors & Save $$$ by halving File Sizes
Batch WaterMark in Auto-Contrasting Colors & Save $$$ by halving File Sizes
Guide: How to Use MagicWaterMark
OverView of MagicWaterMark
MagicWaterMark is a feature-rich Windows 10/11 App for adding Text and / or Images onto your Pictures.
Batches of Pictures can be Water-Marked in seconds.
The app is Feature-Rich but very Easy-to-Use with a rapid learning curve.
MagicWaterMark seperates actions into 4 distinct groups:
'
'
'
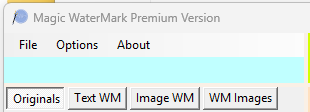
Select a tab for the function you want to use.
The tabs remain hidden until at least one Picture to be Water-Marked has been selected.
The '
Click on a feature in the Table below to jump to the selected item.
Select Pictures to Water-Mark
Quick Start
Text Size
Text Position
Text Angle
Text Transparency
Text Font
Text Color
Text Outline
View Text
Fill-Text
Quick Start
Image Corners
Image Position
Image Size
Image Transparency
Image Angle
View Image
Quick Start
View WaterMarked Pictures
WM one Picture
WM All Pictures
Auto-Remove
WM Display
Water-Marked Size
Water-Marked Quality
Water-Marked Quality
File Sizes
Quick Start
Save Folder
Save File-Names
Image Size
Quick Start
Changing Tabs
Error Log
Restart
Exit
Clear All WaterMarks
Unuse Image WMs
Unuse Text WMs
Show Tips
About
FAQ
Help
Video Guide
Selecting Pictures to WaterMark
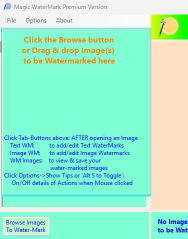
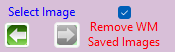
Either Click the 'Browse' button or 'Drag and Drop' Pictures into the area shown:
You can add or remove one or more Pictures for Water-Marking at any time.
Pictures selected are opened but never disturbed or over-written.

All selected Pictures can be removed by clicking the 'Remove All' button.
The Left and Right arrow buttons allow you to view the next or previous selected Picture.
Clicking on a listed Picture name will also display it.
Text Water-Marks Quick Start
Click the 'Text WM' tab to view and edit Text Water-Marks
The 'Include This WM on Images' checkbox must be checked to add this Water-Mark
to your Pictures.

You now have a basic Text Water-Mark that you can customise.
Sizing Text Water-Marks
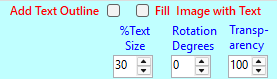
The value selected represents a percentage size of Pictures being Water-Marked.
Size can be related to Picture Height or Width.
The selected dimension to use is set from the 'Text Size' box.

'Auto' option will select the smaller of Height or Width.
The Left and Right arrow buttons change the Picture to be Water-Mark allowing you to see your settings on different sized and shaped Pictures.
Text Water-Mark Location
The Location of a text Water-Mark can be set by 'dragging' it to where you want.
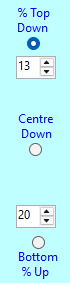

Horizonally you can select an Offset from the Left or Right.
Vertically you can select an Offset from the Top or Bottom.
Or you can select to Centre Horizontally and/ or Vertically.
Offset values represent percentage dimensions of each Picture being Water-Marked
Text Water-Mark Angle
Text Water-Marks can be rotated from -90 to + 90 Degrees.
Allowing Vertical Text to be displayed.
Alternatively Vertical Text can be achieved by following each text character by a carriage return.
Text Water-Mark Transparency
Text Water-Marks can be added with transparencies from almost invisible to
fully opaque.
This is achieved by using the 'Transparency' setting value from 1 (transparent)
to 100 (fully opaque)
Text Water-Mark Font

Clicking the button will allow you to select any scalable font installed on your PC.
You can also select the from the available styles - such as Bold - Italic etc.
Font size is preset to 14 but then automatically calculated to produce the required Text Size for each Picture.
Text Color

'
'
'
Text Outline
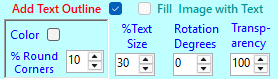
The background color can either be an automatic contrast (whichever text color option you have selected) or a fixed color.
Check 'Color' to choose a fixed color.
The corners of the background outline can also be rounded.
Rounding is a % of the text size. The smaller of text width or height.
Text Edit Viewing
Check 'Show All' 'Texts' to view other selected Text WaterMarks.
Check 'Show All' 'Images' to view all selected Image WaterMarks.
Only Text and Image WaterMarks that are Selected to be used will be displayed
So it is important to uncheck any saved Water-Marks that won't be used with the sample you are editing.
Only the text you are Editing will be changed to match new settings.
Fill Pictures With Text
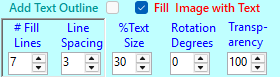
Check 'Fill Image With Text' feature to create Fill-Text.
Two additional settings are then shown:
'# Fill Lines' defines the number of horizontal lines of text.
'Line Spacing' defines the number of spaces between each Fill-Text Line.
Your Water-Mark text will be repeated to fill each line and duplicated with the selected number of line spaces between.
When you rotate the Fill-Text angle additional text lines will be created as required.
It's best to add any spaces along each line at the start of your Text for easy visibility.
Text Size is defined by how the number of Fill-Text lines and spaces - too many quickly shrinks text size to be illegible (unless you have very large Pictures).
Image Water-Marks Quick Start
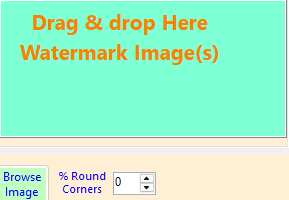
Either Click the 'Browse Image' button or 'Drag and Drop' one or more Images you want to use as WaterMarks.
You can add multiple copies of the same image - but this needs to be done one at a time.

Clicking the 'Remove Selected' button will remove the selected Image Water-Mark along with all of its' settings.
Round Image Water-Mark Corners
The '% Round Corners' setting allows you set how much to round the corners of an Image Water-Mark.
Rounding is a percent of the Image Size. The smaller of Width or Height Will be used.
Range is from 0 to 50%.
A 50% setting will create a circular Image from a square one.
Image Water-Mark Location
The Location of an Image Water-Mark can be set by 'dragging' it to where you want.

Horizonally you can select an Offset from the Left or Right.
Vertically you can select an Offset from the Top or Bottom.
Or you can select to Centre Horizontally and/ or Vertically.
Offset values represent percentage dimensions of each Picture being Water-Marked
Sizing Image Water-Marks

The value selected represents a percentage size of Pictures being Water-Marked.
Size can be related to Picture Height or Width.
The selected dimension to use is set from the 'Image Size' box.
Choices are: Height, Width or Auto.
'Auto' option will select the smaller of Height or Width.
Image Water-Mark Transparency
Image Water-Marks can be added with transparencies from almost invisible to
fully opaque.
This is achieved by using the 'Transparency' setting value from 1 (transparent)
to 100 (fully opaque)
Image Water-Mark Angle
Image Water-Marks can be rotated from -90 to + 90 Degrees.
The 'Angle Degees' sets the rotation angle.
Image Edit Viewing
When Editing an Image to add to to Pictures you can View other Text and Image Water-Marks
you plan to add.
Check 'Show All' 'Texts' to view all Selected Text WaterMarks.
Check 'Show All' 'Images' to view other Image WaterMarks.
Only Text and Image WaterMarks that are Selected to be used will be displayed
So it is important to uncheck any saved Water-Marks that won't be used with the sample you are editing.
Only the Image you are Editing will be changed to match new settings.
Remove-WMd
Water-Marking Quick Start

Default settings simply save Water-Marked versions of your Pictures.
View Water-Marked Pictures
Text and Images Water-Marks are added to your Pictures and displayed for you to see.
Water-Marking One Picture
Click the 'WaterMark This Image' button to save the Picture displayed with your selected Text and Image
Water-Marks.
After saving the Water-Marked picture file, it will be displayed in your PC default picture viewer.
The original Picture will also be removed from your list of Pictures to Water-Mark.
Water-Mark All Pictures
The 'WaterMark All Images' button will automatically start to WaterMark all of the Pictures you
have selected one-by-one.

Also shown will be the number of Pictures Water-Marked and the Total Number to be Water-Marked.
By default, Pictures are removed from your List after they have been Water-Marked.
Clicking the red 'Cancel WaterMarking' button will Stop Water-Marking after completing the Picture it is workin on.
If you allow Water-Marking to complete the final Picture will be displayed in your PC default Picture Viewer.
Auto-Remove Water-Marked Pictures
By default the check-box is checked so that Water-Marked Pictures get Removed.
Uncheck the box to retain Pictures on your List after Water-Marking.
Unchecking allows you to compare Picture Quality against File Size.
Display After Water-Marking
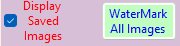
This allows you to check the Picture quality at s bigger size. When Water-Marking all Pictures, only the last Picture will be displayed after Water-Marking.
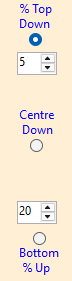
Water-Marked Picture Sizes

Settings can be made from the 'Originals' Tab.
Check the 'Limit Final Image Size' check-box to display Maximum Width and Height settings.
Water-Marked pictures can only be limited in size - never increased. Picture aspect ratio will remain unchanged. Meaning either Width or Height will usually be a limiting factor - not both.
Water-Marked Image Quality
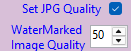
Check the 'Set JPG Quality' check-box to manually set the quality of Water-Marked Pictures. The 'WaterMarked Image Quality' should now be visible allowing the setting to be adjusted.
Higher Values =Quality
Water-Marked Quality Folders
With the 'Set JPG Quality' check-box checked, it is possible to save Water-Marked Pictures in separate Sub-Folders
related to the Quality Level Set.
This allows quick comparisons between Picture Quality and File Size.

The 'Add Quality Sub-Folders' check-box needs to be un-checked to remove the default Save to Sub-Folders Option.
Water-Marked File Sizes
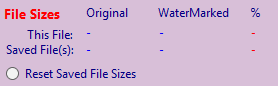
The 'This File' values are Updated for each Picture that has just been Water-Marked.
The 'Saved File(s)' sums each 'This File' values as additional Pictures are Water-Marked.
Clicking 'Reset File Sizes' clears 'Saved File(s) back to zero.
Option Settings
It can be accessed from the Options Menu by clicking on the 'Option Settings' - or clicking 'Alt S' on the Keyboard.
File Save Folder
The Folder Can be changed by clicking on Text Box displaying the folder.
The default folder is set on 'C:' - and not in your 'Picture Folder'.
This is because Microsoft has added 'Special Folder Access' protection prevent Ransomware Attacks.
To change the default save folder to a different drive or the 'Pictures' folder you will need to add MagicWaterMark as a Trusted App.
To do so On Your PC:
Open Settings then select 'Privacy & Security'
Next Select 'Firewall & network protection' then then click on 'Allow an app through the firewall'.
Next Click the 'Change Settings' button to enable the 'Allow another app...' button to work.
Next Click the 'Allow anothr app...' button then the 'Browse' button.
Navigate to 'C:\Program Files\MagicWaterMark' then click on and open 'MagicWaterMark.exe'.
Finally Click the 'Add' button then the 'OK' button.
You will then be able to change your Save Folder to one within 'Pictures'.
File Save Names

The Original File-Name.
Or a Defined File-Name.
Additionally a Prefix and Suffix can be added to the File-Name.
Files are NEVER over-written.
If a chosen file-name already exists in the save folder then numberical suffixes are added or updated.
So if ABCDEF-1.jpg exists, the new file would be saved as ABCDEF-2.jpg.
Hide Parts of Water-Marks outside Visible Parts of PNG Images

Pictures are often centred creating a shaped outline.
Water-Marks - such as 'Fill-Text' would normally fill the whole of a rectangular shape.
If the "Hide Portions of WaterMarks Over Transparent Parts of 'PNG' Images checkbox" is checked then it will hide parts of any WaterMark outside visible parts of the Original Picture.
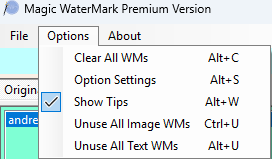
MagicWaterMark Menus

'Files', 'Options' and 'About' each open a list of Items that activate individually when clicked.
Most Menu Items have 'short-cut' key combinations that perform the same action.
Tab-Changing Menu Items
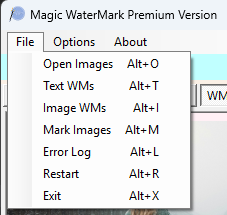
Clicking 'Open Images' or kepboard 'Alt O' selects the 'Originals' Tab.
Clicking 'Text WMs' or keyboard 'Alt T' selects the 'Text WM' Tab.
Clicking 'Image WMs' or keyboard 'Alt I' selects the 'Image WM' Tab.
Clicking 'Mark Images' or keyboard 'Alt M' selects the 'WM Images' Tab.
Error Log
MagicWaterMark includes extensive error recovery and reporting.
Clicking Menu Item 'Error Log' or kepboard 'Alt L' opens the error Log.
Any error captured since MagicWaterMark was last started will be displayed in NotePad.
Otherwise the 'No Errors This Session' Message-Box will be
Clicking 'No' will close the box and allow you to continue.
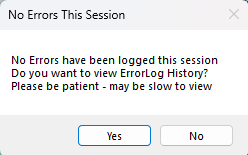
This Full Error Report also contains details of your PC together with the version of MagicWaterMark running plus installation data that might be asked for if you need support.
Restart MagicWaterMark
Clicking Menu Item 'Restart' or kepboard 'Alt R' will close then restart MagicWaterMark.
On Closing you will be offered the option of Saving any changes made to your Water-Marks
but the cancel option will be ignored.
This feature may be useful for saving WaterMark changes you have made or ignoring them and
start from previously saved versions.
Exit MagicWaterMark
Clicking Menu Item 'Exit' or kepboard 'Alt X' will begin closing MagicWaterMark.
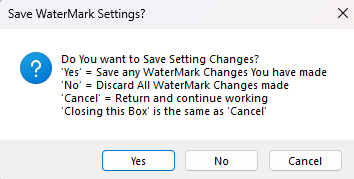
Click 'Yes' to save all of your Text and Image WaterMark settings.
Click 'No' to ignore any Text and Image WaterMark changes made.
Click 'Cancel' to abort closing and continue working.
Closing will not save any Pictures you have selected to WaterMark
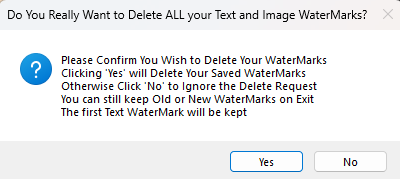
Clear All Saved WaterMarks
Clicking Menu Item 'Clear All WMs' or kepboard 'Alt C' will delete all of the Text and Image
Water-Marks you have created.
But ALL Text and Image Water-Marks saved when MagicWaterMark is closed will still be there.
You need to select the 'Yes' option when closing to permanently save this change.
Tool Tips
Tool Tips are little text boxes that appear as you move your mouse over controls
that are active.
Starting out they help provide a brief description of how things work - but can soon become
a nuisance.
Clicking the 'Show Tip' menu Item or typing 'Alt W' on your keyboard toggles showing the Tips
on and off
Unuse All Image Water-Marks
Clicking the 'Unuse All Image WMs' menu Item or 'Ctrl U' from your keyboard will set the
'Use This WM' Check-Boxes to Unchecked for each Image Water-Mark.
So no Image Water-Marks will be added to your Pictures unless you recheck one or more
of 'Use This WM' Check-Boxes.
A check-box will appear before performing this change - in case it was requested in error.
This feature was added at MagicWaterMark-V1988 to aid changing Image Water-Marks.
Unuse All Text Water-Marks
Clicking the 'Unuse All Text WMs' menu Item or 'Alt U' from your keyboard will set the
'Include This WM on Images' Check-Boxes to Unchecked for each Text Water-Mark.
So no Text Water-Marks will be added to your Pictures unless you recheck one or more
of 'Include This WM on Images' Check-Boxes.
A check-box will appear before performing this change - in case it was requested in error.
This feature was added at MagicWaterMark-V1988 to aid changing Image Water-Marks.
About Box

Information includes the Version of MagicWaterMark you are running.
Click the OK button to close it.
FAQ = Frequently Asked Questions
Clicking the 'FAQ' menu Item or 'Alt Q' from your keyboard will open a Web Page in your
default Web Browser to show answers to Frequently Asked Questions.
Help - MagicWaterMark User Guide
Clicking the 'Help' menu Item or 'Alt H' from your keyboard will open a Web Page in your
default Web Browser to this page.
Video Guide
Clicking the 'Video Guide' menu Item or 'Alt V' from your keyboard will open a Web Page
with YouTube links demonstrating how MagicWaterMark works.